Thursday, March 31, 2011

Crispy Black Bean Tacos

What can I say about these black bean tacos?  Well, to put it plain and simple, they're awesome.  They're refreshing, filling, inexpensive, and left me craving more...and more!  As an added bonus, they're also full of nutrition and are a great meatless option that even an everyday meat lover will enjoy.  Sure, you could probably add a little ground beef to the mix if you really wanted to in order to appease a crazed meat-addict, but really, why mess with perfection?  I can't stop thinking about these tacos.  Most definitely will be making them again soon.  And you should too! 

Crispy Black Bean Tacos

Ingredients

  • olive oil

  • 1 (15 oz.) can black beans (drained and rinsed)

  • 1/2 small onion thinly sliced

  • 2 garlic cloves, minced

  • 1/2 teaspoon ground cumin

  • salt and freshly ground black pepper, to taste

  • 1 Tablespoon lime juice

  • 2 cups coleslaw mix or shredded cabbage

  • 2 green onions, chopped

  • 1/3 cup fresh cilantro, chopped

  • 6 corn or flour tortillas

  • 1/3 cup crumbled feta cheese (or goat cheese)

  • lime wedges, for serving

  • hot sauce, for serving (optional)


Directions

  1. In a small bowl, mix together 2 teaspoons olive oil and the lime juice.  Add the coleslaw, green onions, and cilantro and toss to coat.  Season with salt and pepper to taste and set aside.

  2. Heat 2 teaspoons olive oil in a medium skillet over medium high heat.  While the skillet is getting hot, mash the black beans slightly with a fork, leaving them still a little chunky for texture. 

  3. When the oil is hot, add the onion and garlic and cook about 3 minutes or until the onions are translucent.  Add the black beans, cumin, and season with salt and pepper to taste.  Cook until heated through, about 3 minutes.

  4. Heat a large dry nonstick skillet over medium heat.  Add tortillas in a single layer and heat until golden brown.  Flip, and cook until the other side is golden brown as well (about 1 minute per side). 

  5. Spoon 1/4 of the bean mixture onto the crisped tortilla and top with slaw and cheese.  Serve with hot sauce and lime wedges.


*Recipe slightly adapted from this one.

Tuesday, March 29, 2011

10-minute Apple Cinnamon Quinoa and Oatmeal


Quinoa.  It's not just for dinner anymore! 

But what is it?

Well, quinoa (pronounced 'keen-wah') is an ancient "grain" native to South America that was once considered the "gold of the Incas".  Although most commonly considered a grain, it is actually a relative of leafy green vegetables like spinach and Swiss chard.  It is high in protein and includes all nine essential amino acids.  In addition to protein, quinoa features a host of other health-building nutrients.  Because it is a very good source of manganese as well as a good source of magnesium, iron, copper and phosphorus, this "grain" may be especially valuable for people suffering from migraine headaches, diabetes, and atherosclerosis. (Source: WHfoods.com)

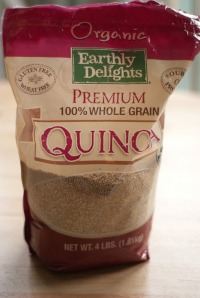
Considering the incredible punch of nutrition, and the fact that I had this HUGE 4 lb. bag of quinoa sitting in my pantry after a trip to Costco, I figured it was about time I found another use for quinoa other than just dinner. 

So here we have it - quinoa and oatmeal for breakfast!  And wow is it delicious and filling.  The fluffy texture and nutty flavor make it the perfect pairing for a unique twist on your morning oatmeal.   

I've made this breakfast several times since I first came across the idea of "quinoa for breakfast", and this is my favorite variation.  Knowing how nutritious it is, I've played with adding different fruits in order to find a variation that my almost 11 month old would enjoy.  Sure enough, he now shares it with me for breakfast (hence the 2 spoons in the photo above)...so long as every spoonful has at least one piece of fruit on it.  (Apparently it's all about the fruit/grain ratio for him.)  But he ate it and he ate it well, so I consider that a big win.  Our favorite variations so far have been made with apples, as mentioned in the recipe below, or ripe Bartlett pears swapped for the apples.  Next I'd like to see if he likes it even more with bananas (one of his favorites) or raisins. 

To cut back on morning prep time (and allow for variation) you can mix all of the dry ingredients together the night before and store them in an airtight container until you're ready to use them.

10-minute Apple Cinnamon Quinoa and Oatmeal


Ingredients


  • 1/4 cup oats


  • 1/4 cup quinoa


  • 1 Tablespoon ground flaxseed


  • 1 teaspoon cinnamon, or to taste


  • 1 apple, chopped


  • 1 - 1.5 cups water (depending on the consistency you prefer)


  • 2-3 teaspoons agave nectar (or 1 Tablespoon Splenda, sugar, or other sweetener) (optional)


Directions


  1. Combine oats, quinoa, flaxseed, cinnamon, and chopped apple in a 2 quart microwave safe bowl.  Add water and stir. 


  2. Microwave on high for approximately 10 minutes or until quinoa is tender and liquid is absorbed, stopping to stir every 1-2 minutes.  (FYI, the quinoa is done when it is tender but still chewy and spiral-like threads appear around each grain.)


  3. Stir in agave nectar or other sweetener (optional) and serve.


Serves 1-2


Notes:  Most any fresh, frozen, or dried fruit would work great in this recipe (pretty much anything you would regularly add to your oatmeal).  As suggested in the original recipe, increase water slightly if you add dried fruit before cooking.

*Slightly adapted from SparkRecipes

You might also like:

Banana Oatmeal Breakfast Cups with Chocolate Chips

Sweet Potato Fries - 3 Ways

Monday, March 28, 2011

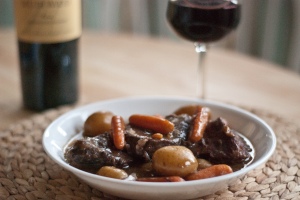
Simple Slow Cooker Pot Roast

This is pure comfort food.  A cinch to prep and absolutely delicious.  I'd never made a pot roast before, but several friends of mine had mentioned it was a perfect meal for the crock pot, so I figured I'd give it a shot.  I knew it would please the hubs, who is just as much of a meat and potatoes guy as the next, and I also knew it would result in a meat that would be tender enough to serve to my 10 month old.  He had never had red meat before this meal, so I wasn't sure what his reaction would be, but sure enough, I put a few thin shreds of the beef in front of him, and he dug right in without hesitation and immediately went for a second, third, and fourth bite until it was gone.  I have a feeling he'll be a meat and potatoes guy just like his Daddy. 

Another bonus to this dish (for all the parents of little ones out there), is that the slow cooking of the vegetables in this dish made them incredibly tender and perfect for serving to a little one such as my son...who only has 6 teeth.  Cut into small pieces, he went to town.  (You could even mash them easily with a fork if your little one is still eating purees.) 

Any meal I can prep that makes everyone happy and doesn't require me to be a short order cook is a super win in my book!

This dish wasn't just about convenience though.  I believe my husband said, "This is good.  Wow, this is really good.  No, really - this is really good!" at least 5 times throughout the meal...and then again after he went up for a second helping.  So I'll take that as a sign of a true keeper.

Simple Slow Cooker Pot Roast

Ingredients

  • 3-4 lb. roast

  • 2 (10 3/4 oz.) cans cream of mushroom soup

  • 1 envelope dry Beefy Onion soup mix

  • 1 Tablespoon worcestershire sauce

  • 1 teaspoon dried thyme or rosemary (I used thyme)

  • 2 cups baby carrots

  • 2 cups small potatoes (I kept mine whole since they were small, but you might want to halve yours if they're on the large side)

  • 8 oz. sliced mushrooms


Directions

  1. Combine the cans of soup, dry onion soup mix, and worcestershire sauce in the crock pot and mix until combined.

  2. Place the roast in the pot. 

  3. Add the carrots, potatoes, and mushrooms (and any other veggies you're in the mood for). 

  4. Cook on low for 4 hours and then turn the heat up to high and cook for another 2-4 hours.  (You could also do high for 3-4 hours or low for 7-9 hours.  4 on low followed by 2 on high is the route I chose though, and it resulted in a ridiculously tender meat.)


Note:  This is a versatile recipe in that you can vary the herbs and use any veggies you have in the fridge (onion, celery, carrots, potatoes, mushrooms, etc.).  You could even leave out the veggies and just prep them on the side if you wish.

*Adapted from allrecipes.com.

Thursday, March 24, 2011

Mexican Pizza

Back when I lived in Chicago, I took several cooking classes at an amazing place that I wish would spread its wings and open up shop in other states and cities around the U.S. (Northern Virginia would be nice) because I seriously miss that place.  It was called The Chopping Block.  It was a recreational cooking school offering all sorts of classes.  I spent a whole summer attending as many as I could, loving them all.  One of my favorites, though, was the monthly course taught by a local registered dietician, Dawn Jackson Blatner, RD, LDN.  For the first 25 years of my life, I never really craved or loved veggies...until I took her classes.  She quickly converted me with all the delicious and nutritious recipes she prepared for us in her classes.  As a result, I learned that veggies weren't just bitter green things that needed to be smothered in butter and cheese in order to taste good.  And today I am able to say that I love veggies, beans, greens, whole grains, and all things good for me.  Yes, miracles do happen.

That being said, this mexican pizza was one of the first recipes from Dawn that I loved at first bite.  I've made it at least 30 times, and there have been many months where I've made it every single week.  Yes, I crave it that much.  It's a pretty simple recipe for a mexican pizza, but it's delicious and on the table in 30 minutes.  Even better - you can feel good about devouring it since it's packed with nutrition. 

As for the toppings, feel free to vary them to your liking.  The hubs and I always do.  We literally divide our pizza in half by drawing a line in the sand (beans) and then we each put the toppings on our half.  Marriage is all about compromises, right?  Basically, the hubs' side gets more green onion, more jalapenos, more olives, and less tomato.

(Recipe makes 2 full pizzas as written.  Obviously just cut everything in half if you want to make 1 pizza.)

Mexican Pizza

Ingredients

  • 2 whole wheat thin crust pizza crusts (Boboli Thin Crust or Whole Foods 365 brand™)

  • 1 (16 oz.) can spicy vegetarian refried beans

  • 2 small tomatoes (I used roma), very thinly sliced

  • 6 green onions, chopped

  • 1/4 cup canned sliced black olives, drained

  • 1/2 cup pickled jalapeƱo slices (aka, “nacho" peppers)

  • 1/2 cup shredded cheddar jack cheese (I'm usually all for more cheese, but too much can actually ruin the flavors here; don't be tempted to dump it on)

  • 1/2 cup salsa

  • 1 avocado, chopped


Directions

  1. Preheat oven to 400 degrees.

  2. Spread beans on pizza crust and top with tomatoes arranged in a single layer.  Top with onions, olives, peppers, and cheese.

  3. Place pizza straight on the oven rack (no baking sheet needed) and bake for 10 - 12 minutes. 

  4. Slice into wedges and top with a little bit of salsa and a few slices of avocado (These toppings are a MUST!  Do not skip this step!).


Notes:  I highly recommend sticking with a very "thin crust" pre-baked crust for this pizza.  Boboli white/regular or whole wheat thin crust is excellent.  I do not recommend a thick crust or a canned crust like the Pillsbury variety. 

*Original recipe from the very talented lady who finally convinced me that ALL veggies can be delicious, Dawn Jackson Blatner RD, LDN.

Tuesday, March 22, 2011

Sweet Potato Fries - 3 ways

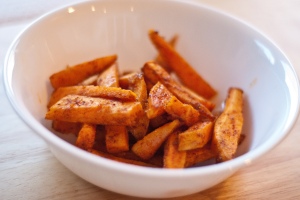
When searching for a nutritious and delicious side dish that both the hubs and I could enjoy alongside our 10 month old, sweet potatoes immediately came to mind.  I mean really - have you ever met a baby that doesn't love sweet potatoes?  They're a pretty common first veggie, and my son fell in love with them at first bite.  And now that our little man is eating what mommy and daddy are eating, sweet potato fries were an obvious choice for a regular side dish. 

In hopes of exposing my son to more flavors, I prepared these sweet potato fries 3 different ways.  It was a bit of a taste test experiment sort of deal.  Go figure, he loved all 3 ways and didn't seem to care whether they were coated with the ordinary salt and pepper or a combination of a few random spices.  But in case your child is a picky eater, this is an easy veggie side dish to try as a means for introducing new spices and flavor combinations, so get creative!  Pumpkin pie spice, chinese five spice, garam masala, cajun seasoning...the sky's the limit.  Just peel and cut 3 sweet potatoes into sticks, and then toss them in your desired spices with a little bit of oil.  Below are just 3 of the ways I chose to prep them this week.  Which one do you think you or your little one will like best?

Tip:  I peeled and cut the potatoes into sticks one day, and then time got away from me (anyone else have that problem?), so I just put them in a container and covered them in cold water until I was ready to use them.  After draining them and patting them dry, they were perfectly crisp and ready to go even after 3 days sitting in the cold water.  That being said, this would be a perfect veggie side dish to prep on a Sunday and have ready to go for a quick weeknight side.  My 10 month old devoured them for dinner one night and lunch the next.  The hubs and I enjoyed every last bit of them as well.

Sweet Potato Fries - 3 Ways

#1 - Ingredients

  • 1 sweet potato, peeled and cut into sticks

  • 1 Tablespoon olive oil

  • kosher or sea salt

  • freshly ground black pepper


#2 - Ingredients (inspired by this yummy recipe)

  • 1 sweet potato, peeled and cut into sticks

  • 1 Tablespoon olive oil

  • 1/1 teaspoon garlic salt

  • 1/2 teaspoon chili powder

  • 1/4 teaspoon ground ginger

  • 1/4 teaspoon ground cumin


#3 - Ingredients

  • 1 sweet potato, peeled and cut into sticks

  • 1 Tablespoon olive oil

  • 1/4 teaspoon cumin

  • 1/4 teaspoon coriander

  • 1/4 teaspoon cinnamon


Directions

  1. Preheat oven and baking sheet to 450 degrees.

  2. For each "way", combine oil and spices in a medium sized bowl.  Toss sweet potato fries in the oil and spice mixture until well coated.

  3. Spread all 3 prepared sweet potato fries in a single layer on a rimmed baking sheet.  Bake for 15-20 minutes.  Flip, and continue baking for an additional 10-15 minutes (or until they are lightly browned).  Total baking time is approximately 25-30 minutes.


Serves 4-6 as a side dish.

*Inspired by Simply Recipes.


Monday, March 21, 2011

Homemade Samoa Cookies

Samoas are my most favorite girl scout cookie ever. 

Ever. 

The chocolate.  The coconut.  The gooey caramel.  All combined into a little bite of confectioner's heaven.

If you crave these cookies as much as I do, but are tired of having to wait anxiously for the arrival of girl scout cookie season every year, then this recipe is for you.  With a little time spent in the kitchen, you can now enjoy these caramely, chocolatey, coconut Samoas all year round.  

Mmm, okay.  Twist my arm! 

Homemade Samoas

Cookies

  • 1 cup butter, softened

  • 1/2 cup sugar

  • 2 cups all-purpose flour

  • 1/4 teaspoon baking powder

  • 1/2 teaspoon salt

  • 1/2 teaspoon vanilla extract

  • up to 2 Tablespoons milk


  1. Preheat oven to 350 degrees.

  2. In a large mixing bowl, cream together butter and sugar.  Mix in flour, baking powder, and salt at a low-speed.  Then add the vanilla and milk, adding in milk only as needed to make the dough come together without being sticky.  The dough will be a soft, not-too-sticky ball.

  3. Divide the dough into 2-3 portions.  Roll out each portion between two pieces of wax paper to about 1/4 inch thickness or less (thinner dough will yield a crispier cookie when baked).  Using a 1 1/2 inch cookie cutter, cut out round cookies.  Transfer the rounds to a parchment lined baking sheet.  (Optional - use a knife or a straw to cut a small hole in the center of each cookie).  Repeat with remaining portions of the dough.

  4. Bake cookies for 10-12 minutes or until the bottoms are lightly browned.  Let cool for a few minutes and then transfer to a wire rack.


Topping

  • 3 cups shredded coconut (sweetened or unsweetened)

  • 12 oz. good quality chewy caramels

  • 1/4 teaspoon salt

  • 3 Tablespoons milk

  • 8 oz. dark or semisweet chocolate (chips are okay)


  1. Preheat oven to 300 degrees.  Spread coconut evenly on a parchment lined baking sheet.  Toast for 10-20 minutes stirring every 5 minutes until coconut is lightly toasted.  Cool, stirring occasionally, and set aside.

  2. Unwrap caramels and place in a microwave safe bowl with milk and salt.  Microwave on full power for 3-4 minutes, stirring every 60 seconds, until caramel is melted.  When smooth, fold in the toasted coconut.

  3. While the topping is still hot, spread on cooled cookies, using about 2-3 teaspoons per cookie.  (If the topping gets too firm to work with, just pop it into the microwave for a few seconds to loosen it up again.)

  4. While topping sets up, place chocolate in a small microwave safe bowl.  Heat on full power in the microwave in 45 second intervals.  Stir after each interval to prevent scorching.  Once melted, dip the base of each cookie into the chocolate and immediately place on parchment paper.  Transfer all remaining chocolate to a Ziploc bag.   Snip off one corner to make a piping bag and drizzle chocolate over the cookies.

  5. Let chocolate set completely before storing in an air tight container.


*Original recipe from Sweetly Serendipity.  (I should also thank Lauren, over at L-Mo Cooks...and Reads, for discovering the source of this recipe and passing it along for me to give it a go!)

Thursday, March 17, 2011

Salsa Cheese Dip

This simple concoction has been my go to chip-n-dip for several years now.  It's easy, appeals to most all palates, and can become quite addicting.  For that reason, it's become pretty much "required" at every family function in the past few years.  It's perfect as a chip-n-dip appetizer, or, if you're my husband, it makes the perfect snack (and sometimes meal) while watching sports.  Whenever I don't know what to bring to a potluck or last minute shindig, this is what I bring.  

Salsa Cheese Dip

Ingredients 

  • 1 cup salsa

  • 1 1/2 cups shredded cheese (taco, mexican, or cheddar are great)

  • 1 (8 oz.) package cream cheese, softened

  • 1 cup sour cream

  • Tortilla chips


Directions

  1. In a medium-sized bowl, cream together the softened cream cheese and sour cream using a hand mixer.

  2. Add the salsa and cheese and mix well. (You can just mix with a spoon here if you prefer.)

  3. Serve immediately with your favorite tortilla chips or refrigerate for later.


Note:  I've always served this dip cold, but I imagine it'd probably be just as great heated and served warm.

Tuesday, March 15, 2011

Banana Oatmeal Breakfast Cups with Chocolate Chips

Welcome to the first installment of my new blog feature, Toddler Tuesdays!

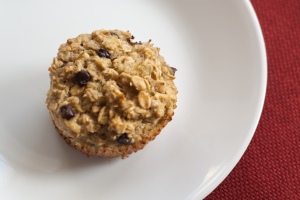
While hunting for quick and healthy breakfast ideas that both my soon-to-be toddler and I would enjoy, I came across this great recipe idea over at Green Lite BitesI especially loved them because there are no heaping cups or even half cups of added sugar!  They also give a delicious purpose to those almost black bananas sitting on your counter that are otherwise soon to be in the trash.  They're quick, nutritious, taste great, AND they're portable.  Broken into small pieces, they were a perfect finger food for my little one and a great variation on the usual bananas and oatmeal breakfast.  Hubby and I gobbled 'em up just as fast as our little peanut did!

Even better, this recipe is also incredibly flexible and can be tweaked in about a million different ways, so feel free to experiment with using different fruits and add-ins and get creative!  (In fact, if you head over to the original recipe, Green Lite Bites, you'll find plenty of inspiration for variations on this recipe in the comments section.)

Banana Oatmeal Breakfast Cups with Chocolate Chips

Ingredients

  • 3 mashed ripe bananas (the more ripe the better)

  • 1 cup Vanilla Almond Milk* (you can use skim, 1 or 2%, or whole milk if serving to little ones under 1 year old - I did - but you might want to add a little sweetener like agave nectar, splenda, truvia, etc. if you do; honey is okay too, as long as serving to 1 year olds and up)

  • 2 eggs

  • 1 Tablespoon baking powder

  • 3 cups Old Fashioned or Rolled Oats

  • 1 teaspoon vanilla extract

  • 3 Tablespoons mini chocolate chips

  • Optional add-in ideas:

    • 1 Tablespoon ground flax seed

    • A few shakes of cinnamon (to taste)

    • walnuts* or raisins instead of chocolate chips


*Recommended for 1 year olds and up, assuming no known nut allergies.

Directions

1.  Preheat oven to 375 degrees.

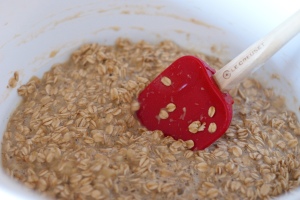
2.  Combine all ingredients, except for the chocolate chips, in a large bowl and mix together.  Set aside.


3.  Line a muffin pan with liners and spray them lightly with cooking spray.


4.  Add the mini chocolate chips to the batter and mix well.


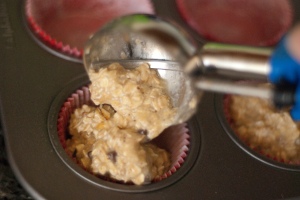
5.  Spoon the batter into 15 muffin cups, filling them almost all the way.  (A level scoop of an old-fashioned ice cream scoop is actually the perfect amount.)


6.  Bake 20-25 minutes or until firm to the touch and edges start to brown slighly.  (20 minutes was all I needed, but I know all too well that oven temps can vary.)


Note:  As I mentioned above, this recipe is incredibly flexible and can be tweaked in about a million ways, so please experiment and get creative!  And definitely let me know here in the comments if you find a new variation you love.  I'm always looking for new ideas too!


Approx Nutritional Information per serving
ServingsAmt per Serving
       15          1 oatmeal cup
CaloriesFatFiberWWPs
      115    3g   2g      2
SugarSat FatCarbsProtein
       6g    1g  21g    4g

 *Original recipe and nutritional info comes from Green Lite Bites.  A great site I recently came across that is full of healthy and delicious recipes.  Definitely one worth checking out!   (FYI, WWPs stand for Weight Watcher Points.)

Monday, March 14, 2011

Toddler Tuesdays

In a mere 6 weeks, my "baby" will be officially classified as a TODDLER.  

Wait.  What?  How did that happen??

I know, I'm just as shocked as he is.  But I think I'm ready for all the fun and changes ahead. 

I think.  I hope! 

Speaking of changes...

One of the biggest immediate changes I think most new parents fret over is toddler food.  Suddenly we are responsible for providing our little ones with meals that meet ALL of their nutritional needs every single day.  Previously, we were able to rely on them getting their core nutrition from the bottle or the boob.  Now, it's up to us!  

That being said, I'm hopeful that a new blog feature I'll be starting this week, Toddler Tuesdays, will help us all dive into this challenge with new ideas, recipes, and inspiration.  More importantly, it will address one of the most common conversations I've had recently with other new moms of toddlers and soon-to-be toddlers.  It may sound familiar.  It goes something like this... 

"What in the world do you feed your kid?  I'm worried they're not getting enough nutrition, and I'm getting tired of all the same old finger foods and toddler foods!" 

If that sounds at all familiar, or if you're just looking for new ideas, then Toddler Tuesdays is for you. 

Toddler Tuesdays will be an additional blog post every Tuesday that will feature new toddler-friendly recipes, finger food ideas, or anything helpful I can drum up that relates to feeding our little ones healthy, easy, toddler and family-friendly meals and snacks.  I'd prefer not to become a short order cook preparing special breakfasts, lunches, dinners, and snacks that only my soon-to-be toddler will eat, so hopefully my husband and I (and all of you) will enjoy these recipes and ideas as well! 

You can look for these toddler inspired recipes and ideas to be posted on my blog on...Tuesdays!  First one is coming up tomorrow!

Pizza with Roasted Peppers and Goat Cheese

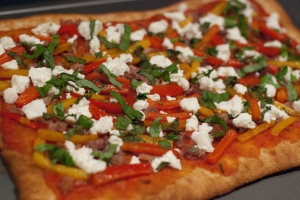
This pizza is light on sauce and topped with creamy goat cheese, fresh basil, roasted sweet peppers, and a little prosciutto (if you like). It's perfect for a quick weeknight meal, undoubtedly my new favorite make-at-home pizza, and I'm so glad I found it. Why?

Well, being from Chicago, pizza is a necessity.  It's a weekly staple.  Everywhere you go it's delicious.  No matter how you shape it, bake it, or make it, it's perfection.  There are no "mediocre" pizzas.  If there were, they'd close in a week due to all the competition.  But out here in Northern Virginia...not so much.  Mediocre at best is all there is. 

The hubs and I have tried all the chains, all the mom-and-pop pizza shops, all the places people have suggested to us, yet unfortunately the best pizza we've found out here is frozen pizza.  Yes, it really is that bad out here.  Sure, there are some that I would go so far as to consider decent, but when you're used to Chicago pizza, it's just really hard to compare.  That being said, the hubs and I are always on the hunt for new and different frozen pizzas. 

Well, I finally found my favorite about 2 years ago.  I could've eaten it every night of the week.  A crispy thin crust heaven of a pizza topped with creamy melted goat cheese and roasted sweet peppers.  Simple, yet heaven in my book.  Then, out of nowhere, the stores out here stopped carrying it!  I searched everywhere.  It was gone!  I even checked the product webpage of the brand that made the pizza, and sure enough, they stopped making it!  What?!?  How could they??  I was heartbroken.  Absolutely heartbroken.

So, as you can imagine, my eyes lit up and I immediately started salivating when I came across this recipe.  It was every bit of the pizza heaven I remembered and then some.  We devoured the whole thing. 

Pizza with Peppers and Goat Cheese

Ingredients
  • Pillsbury "thin crust" pizza crust
  • Olive oil
  • Cornmeal for sprinkling
  • 1 red bell pepper, sliced
  • 1 yellow bell pepper, sliced
  • 1/2 cup tomato sauce
  • 2 oz. sliced prosciutto, cut into fine shreds (optional)
  • 4 oz. fresh goat cheese crumbles
  • 1/4 cup chopped fresh basil, divided
  • Salt and freshly ground pepper

Directions
  1. Position oven rack on the 2nd lowest rack in your oven.  Preheat oven and large baking sheet at 500 degrees for at least 15 minutes.
  2. Heat a little olive oil in a small skillet over medium heat, and saute the sliced peppers about 8 minutes, until slightly softened.
  3. Generously sprinkle a large cutting board with cornmeal and lay the pizza dough on top.  Brush lightly with olive oil.
  4. Remove the baking sheet from the 500 degree oven and carefully transfer the pizza dough.  Prick a few holes in the crust with a fork and bake for a quick 3 minutes, just to firm it up a bit.
  5. Remove the partially baked crust and top with tomato sauce, prosciutto (optional), peppers, goat cheese, and half of the basil.  Bake 5-7 minutes or until crust is golden brown.  Watch it carefully while baking though, as it can burn quickly at 500 degrees!
  6. Allow to cool for 3 minutes.  Top with the rest of the chopped basil, season with salt and pepper to taste, and serve.


A few notes:  Next time, I'm thinking of throwing in a few sliced red onions (sauteed with the sliced peppers) as well to get a few more veggies on my plate.  Also, regarding the crust, I'm sure you could use any pizza crust for this recipe; however, I'd highly recommend sticking with a thin crust (I bet Boboli's whole wheat thin crust would be delicious...and a *tad* bit healthier than the Pillsbury in a can).  Just adjust the baking time accordingly (omitting the pre-baking of the crust if your substitute is already pre-cooked).  I used Pillsbury only because the hubs did the grocery shopping for the week and Pillsbury in a can was we got!  And I wasn't going to complain.  It was PERFECT!  If you're ambitious you could even make your own thin crust as called for in the original recipe.  I just don't have that kind of time on a weeknight.  Oh, and one last note - I tagged this recipe as 'vegetarian' (even though it has prosciutto) as I'm certain it would be just as delicious without the prosciutto. 

*Recipe adapted from this one over on the blog Apple A Day.

Friday, March 11, 2011

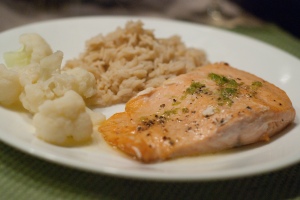
Salmon with Garlic Lime Butter Sauce

With the season of Lent underway and fish being a popular Friday choice, I figured today was the perfect day to post another favorite salmon recipe.  This salmon recipe particularly caught my attention because it's incredibly easy and uses all ingredients that I usually have in the house.  Simple ingredients, but full of flavor (even my 10 month old loved it)!  Serve it with some rice and a side of veggies and it's a perfect, quick, weeknight meal full of omega-3s.

I love to broil my salmon as I find it to be a pretty fool-proof way for it to always turn out just right; however, feel free to grill it, bake it, or do what you wish for this recipe.  The garlic lime butter sauce is what makes this dish, and it doesn't get poured on top of the fish until after cooking!

As a side note, my husband and I like a little heat to just about everything we eat, so we actually added a dash of cayenne pepper to the sauce halfway through the meal on a whim.  It gave us the desired effect, but if I were to prepare it again and was in the mood for a little heat, I would mince up a habanero or 2 for more of a refreshing punch of heat.  The sauce is absolutely scrumptious as written though, so that is completely optional.  But if you also like a little heat, it might be worth trying.

Salmon with Garlic Lime Butter Sauce

Ingredients

  • 4 frozen salmon filets, thawed

  • 1 1/2 teaspoons finely grated lime zest

  • 1 large garlic clove, finely minced (or pressed)

  • 1/4 cup freshly squeezed lime juice

  • 1 teaspoon salt

  • 1/2 teaspoon black pepper

  • 1 stick (1/2 cup) unsalted butter, melted


Directions

1.  Set oven to broil.  Make sure your oven rack is positioned on the 2nd highest rung from the top.

2.  Whisk together the garlic, lime juice, salt, and pepper.  Continue whisking while slowly adding the melted butter.  Set aside.


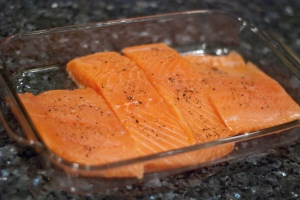
3.  Place salmon filets in a glass baking dish lightly greased with olive oil or cooking spray.  Season filets with a little salt and pepper.


4.  Use a foil "snake" (photo below) to prop your oven door open a bit while cooking (just do it...Alton Brown says so), and broil the filets for a total of about 7-8 minutes, flipping them once about half way through.  Test for done-ness by cutting into one filet.  Salmon should flake easily and be opaque in color. 


5.  Remove from broiler.  Serve with a generous sprinkling of lime zest and a tablespoon or two of garlic lime butter sauce poured on top.  (Whisk or stir up the sauce just before pouring as it will separate.)


Note:  You should have plenty of extra garlic lime butter sauce, so don't let it go to waste!  It's excellent on vegetables.  I served "clean out the freezer" veggies with our meal, so we served it over broccoli and cauliflower.  It was delish!  According to the original recipe, this sauce is also excellent on corn on the cob. 

*Adapted from this recipe.

Thursday, March 10, 2011

Swiss Baked Chicken

This recipe is perfect for those nights when you have zero energy to cook (something I think any working or SAHM or SAHD can relate to), yet you want a home-cooked meal.  There's no chopping and you can have this baby prepped in 5 - 10 minutes.  That being said, this recipe has become a regular in our household ever since my mother-in-law shared it with me a few years ago. 

My husband remembers his mom making this meal quite regularly growing up.   Having a family of 6 (including 4 very hungry boys and a husband) to feed every night, it's no wonder she turned to this recipe often.  She usually doubled it, using 2 casserole dishes, to feed their family of 6.

Swiss Baked Chicken

Ingredients

  • 4 boneless skinless chicken breasts

  • Swiss cheese slices

  • 1 (10.75 oz) can Cream of Celery soup

  • 1/4 cup dry sherry, cream sherry, or vermouth-cooking sherry**

  • 1 cup herb-flavored salad croutons

  • 3 Tablespoons butter


**I've always used cream sherry since I can easily find it at the grocery store

Directions

  1. Preheat oven to 350 degrees.

  2. Arrange chicken in greased baking dish.  Place cheese slices on top.

  3. In a small bowl combine soup with sherry and mix well.  Pour over cheese.

  4. Sprinkle with croutons, dot with butter, and bake for 1 hour uncovered.


*Recipe courtesy of my Mother-in-Law.

Oh, and I can't forget...  Honorable mention goes to my husband for doing the cooking of this dish the night it was photographed.  (It had been a very long day...sick 10 month olds like to be held.  A lot.)  So way to go hubs!  A home-cooked dish was just what I was craving after caring for our sick little love bug all day.  I think it tasted even better since I didn't have to make it. ;)

Monday, March 7, 2011

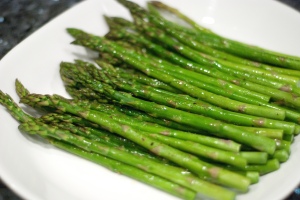
Easy Oven-Roasted Asparagus


3 ingredients, 5 minutes to prep, and in the oven it goes.  Can't get much better than that.  This is the easiest and most delicious way I know to prepare asparagus.

Asparagus is one of those vegetables that screams spring, so with spring just around the corner, I figured it was about time we started eating it again.  It's also incredibly nutritious.  It's high in folic acid (great for any prego ladies out there), is a good source of potassium, fiber, vitamin B6, vitamins A and C, and thiamin.  And did you know that the larger the diameter, the better the quality?  Well now you do!  So grab a bunch of asparagus next time you're in the produce section and give this a shot.  It's quick, easy, healthy, and nutritious.  Works for me! 

Easy Oven-Roasted Asparagus

Ingredients

  • 1 bunch of asparagus

  • Olive oil

  • Kosher or Sea salt and freshly ground black pepper


Directions

  1. Preheat oven to 400 degrees.

  2. Wash and trim the woody stems off of the asparagus so they're all approximately the same length

  3. Place asparagus in a single layer on a baking pan lined with foil for easy clean-up.

  4. Generously drizzle with olive oil and season with salt (don't be skimpy with the salt!) and freshly ground pepper.

  5. Roast in oven until the asparagus turns bright green and still has a slight crunch (I use a fork to test their done-ness), about 12-18 minutes.  Do not overcook or they'll start to lose their crunch.

Thursday, March 3, 2011

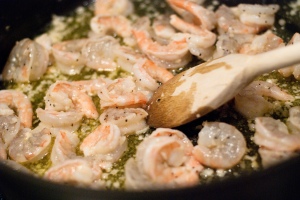
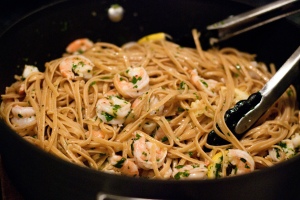
Linguine with Shrimp Scampi

When I saw the picture for this recipe in my Barefoot Contessa Family Style cookbook, I knew I wanted to try it.  A few years later, and I finally did. 

Why did it take me a few years to finally make this recipe?  Well, I only have one excuse:  I was intimidated by having to cook raw shrimp.  I'd never cooked raw shrimp before, and the fear of overcooking it and having it turn rubbery was all it took to hold me back.  But now, a few years later, I can successfully say I did it!  And...it was easy!  The instructions to this recipe were spot on and the result was restaurant quality deliciousness.  It was also surprisingly easy to make (especially considering the impressive result), and I had most all of the ingredients already in the house.

Note:  I thought the amount of lemon and garlic was perfect in this recipe as it was written, but I think my husband would have liked a little more garlic and a little less lemon.  But in my mind, she who does the cooking wins.  Maybe next time we'll make it his way.  Either way, both flavors are very easy to adjust to your liking.

Linguine with Shrimp Scampi

Ingredients

  • Vegetable oil

  • Kosher salt

  • 1 1/2 lbs. linguine (I used whole grain)

  • 6 Tablespoons unsalted butter

  • 5 Tablespoons olive oil

  • 3 Tablespoons minced garlic (approx. 9 cloves)

  • 2 lbs. peeled and deveined raw shrimp (approx. 32 large shrimp), thawed if frozen

  • 1/2 teaspoon freshly ground black pepper

  • 3/4 cup chopped fresh parsley

  • Grated zest of 1 lemon

  • 1/2 cup freshly squeezed lemon juice (about 4 lemons)

  • 1/2 lemon, thinly sliced into half-moon rounds

  • 1/4 teaspoon hot red pepper flakes


Directions

1.  Bring a large pot of salted water to boil.  Once boiling, drizzle a little vegetable oil in the pot, and then add 1 tablespoon of salt and the linguine.  Cook according to the directions on the package.

2.  While the pasta is cooking, melt the butter and olive oil in a 12-inch heavy-bottomed pan over medium-low heat.  Add the garlic and cook for 1 minute, stirring often to make sure the garlic doesn't burn. 

3.  Add the shrimp, 1 tablespoon of salt, the black pepper, and saute for approximately 5 minutes or until the shrimp have just turned pink, stirring frequently.


4.  Remove from heat.  Add the chopped parsley,  lemon zest, lemon juice, lemon slices, and red pepper flakes to the pan.  Stir to combine.


5.  When the linguine is done cooking, drain the liquid, and put it back in the pot.  Immediately toss together with the shrimp and sauce (in either the pasta pot or the heavy-bottomed pan). 


6.  Serve and enjoy. 


*Original recipe can be found in the cookbook Barefoot Contessa Family Style.
Related Posts Plugin for WordPress, Blogger...